Step 4: Reviewing and Tagging Images
The process of reviewing and tagging photos will vary depending on your image dataset and project goals. The steps below outline a generalized workflow for tagging images.
-
Start the Timelapse software. (This is the
Timelapse.exefile in your Timelapse directory.) -
Load your template:
- Go to File → Load template, images, and videos.
- Navigate to the root folder of your image dataset and select the Timelapse template.
- This will load your images into Timelapse.
-
Review and tag images:
- Move through each image (using the arrow keys ← →), identifying all animals present.
- If your camera traps were set up to shoot multiple images each time it was triggered, you can move forward or back an "episode" (all images in a sequence) using ctrl+→ or ctrl+←
- the c key will copy the the values from the previous image and fill them in on the current image. This only applies to "copyable" fields in the Timelapse template for your project.
- the ↑ and ↓ keys will show the difference between the current image and the next / previous image highlighting pixels that changed. This is helpful for spotting where an animal is in the image.
- If more than one species appears in an image or video, use Edit → Duplicate this record (
Ctrl+D).- This will create an additional entry in the database, allowing you to annotate each species separately.
- You can use Select → Custom selection... to filter what images are viewed to focus on specific metadata fields (folders, Favorited images, date/time range, etc)
- Timelapse has a built-in image adjuster that can be used to change the contrast, brightness, and apply temporary transformations to the current image. This option can be accessed Options → Temporarily adjust image appearance.
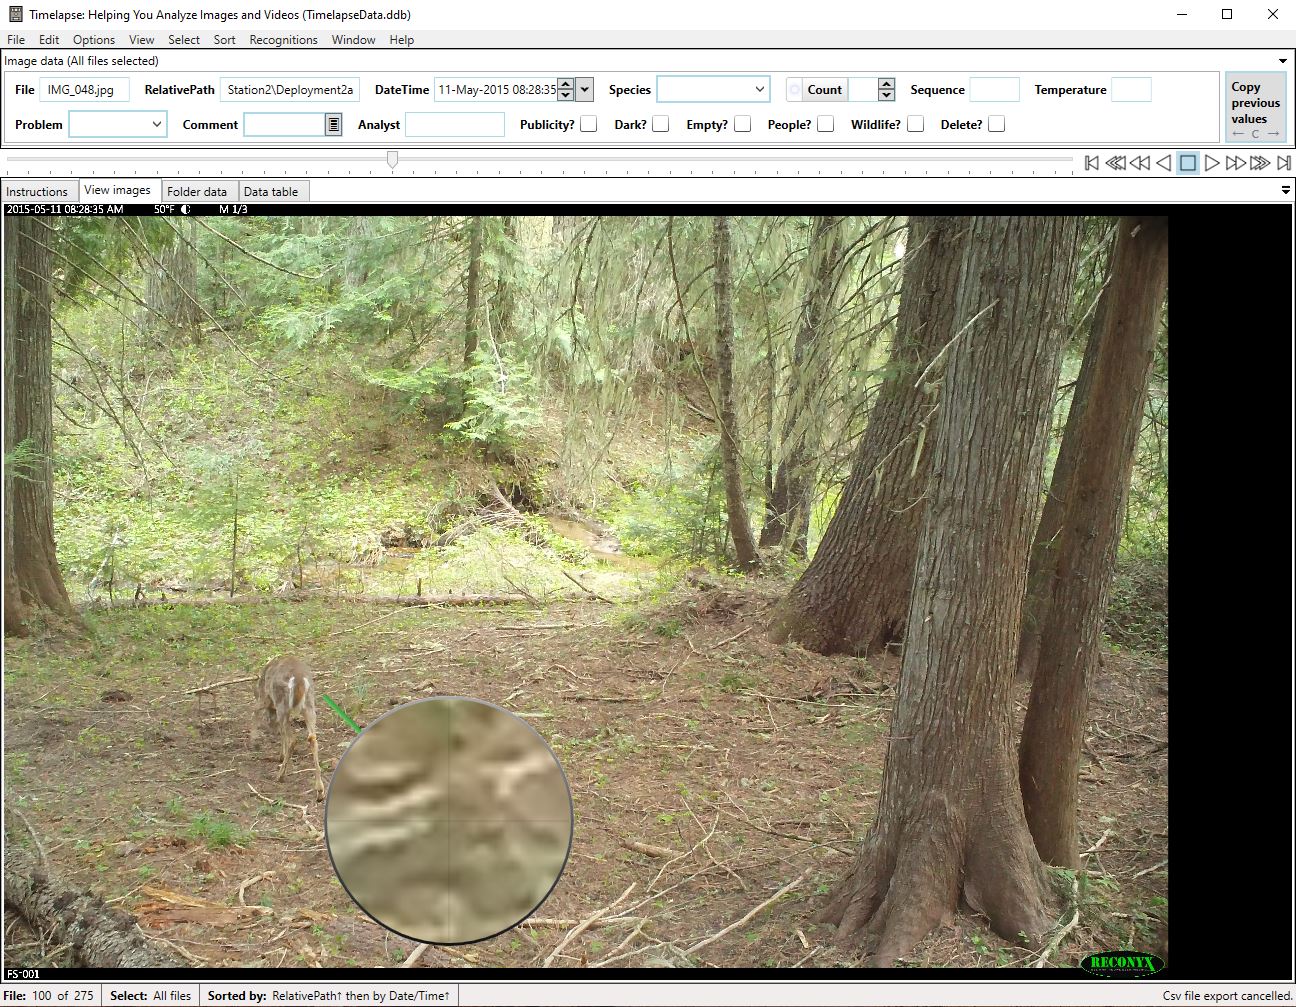 Example of tagging images in Timelapse using the practice image set.