Step 3: Apply Local Contexts Labels to a dataset
Prerequisite: Labels must already exist in the data warehouse from the previous step, Fetch Labels from the Local Contexts Hub.
In Windmill, open the app Guardian Connector Local Contexts Annotations (summary: GC Local Contexts Annotations). It uses a three-step flow.
Step 1 — Select dataset and label set
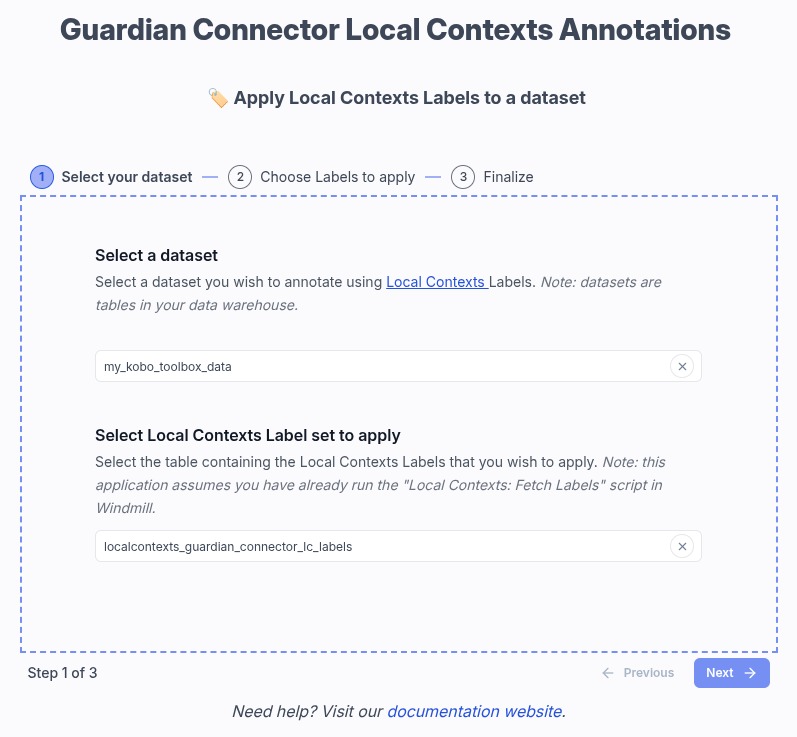
- Dataset — Choose the warehouse Table you want to annotate. Datasets are the same tables you use elsewhere in Guardian Connector.
- Local Contexts Label set — Choose the
localcontexts_…table produced by Local Contexts: Fetch Labels. If nothing appears here, the fetch script has not run successfully yet.
Step 2 — Choose TK and BC labels
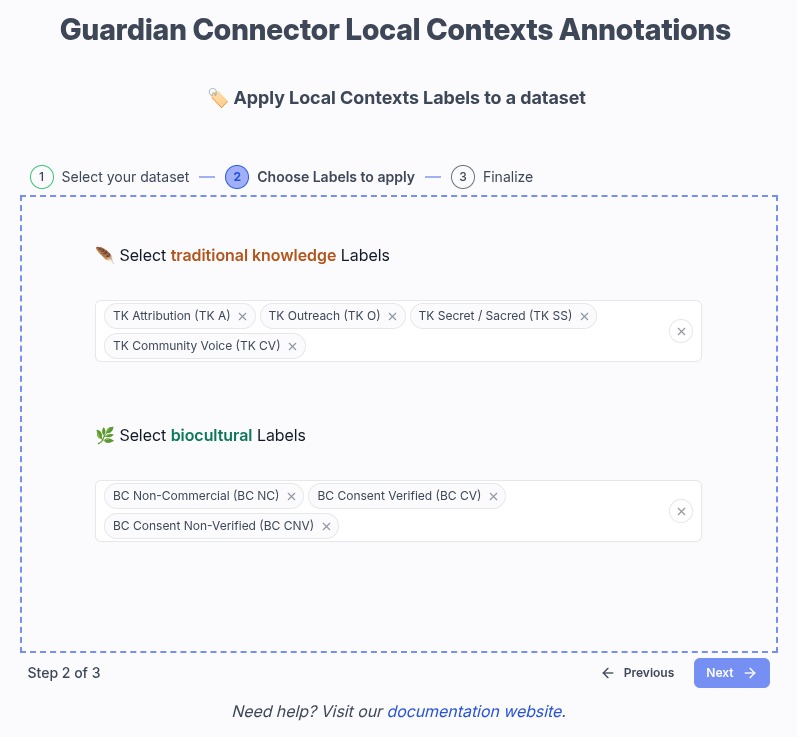
- Pick Traditional Knowledge labels and Biocultural Labels from the options loaded from your selected label-set table.
- If you have already applied Labels to this dataset before, the app will show you which Labels are already applied, and you can adjust the selection.
Step 3 — Review and save
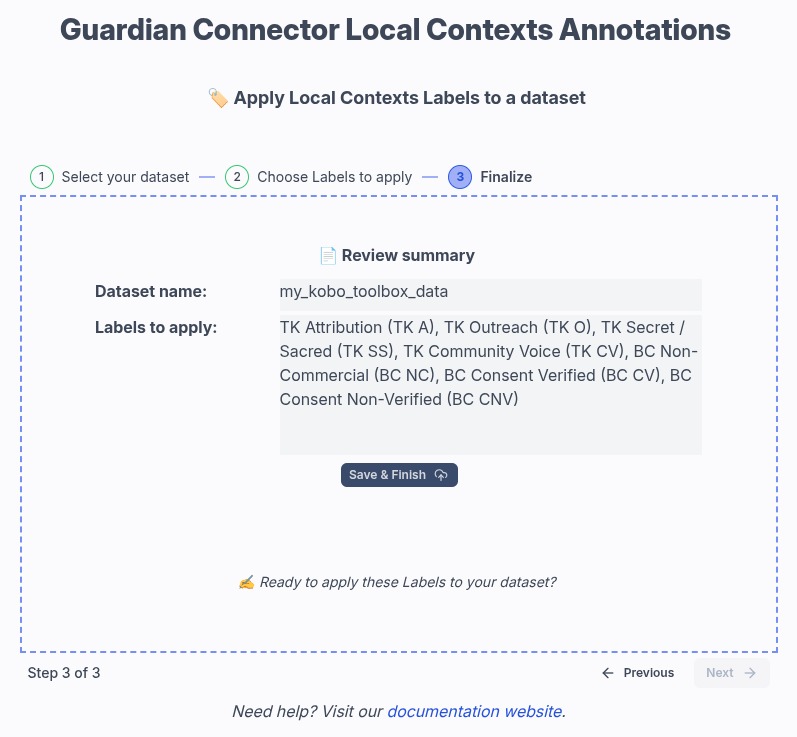
- Confirm the dataset name and the list of Labels to apply.
- Use Save & Finish to write the mapping.
What gets written
- The app does not modify records in the main dataset table.
- It writes to a companion mapping table named
{dataset_name}__lc_labels, creating it if needed. - Saving replaces the previous mapping for that dataset (existing records for that mapping table are cleared, then the new selection is inserted).
Next
Now that you have applied Labels to a dataset, you can use the Labels for data cataloging, metadata tagging, and discovery purposes.