Step 1: Sensor Preparation
This guide describes how to prepare an AudioMoth sensor prior to field deployment.
Required Applications
Download the following applications from Open Acoustic Devices:
-
Flash App (desktop) – update firmware
-
Configuration App (desktop) – load recording schedule
-
Time App (desktop) – set device clock
-
Chime App (mobile) – set clock in the field (from the iPhone app store or Google Play Store for Android devices)
::: tip Ensure all applications are updated. Firmware and Time apps usually do not require frequent updates. :::
Prepare the microSD Card
AudioMoths require a microSD card to record. The creators of AudioMoth have tested many cards and have found that Sandisk Extreme UHS Speed Class 3 (U3) microSDXC cards are the most energy efficient. See the SD Card Guide for more info.
-
Insert microSD card into your computer (you will need a microSD card adapter).
-
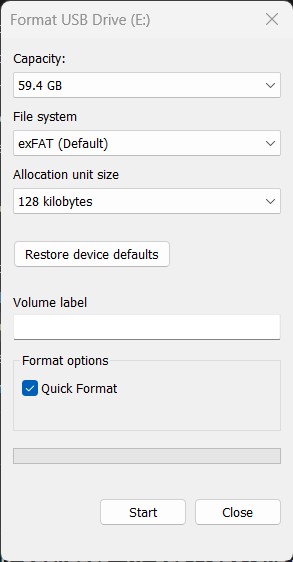
Format the card to EXFAT.
::: warning This erases all data on the card. :::
Windows Formatting Instructions
-
Insert the microSD card into your computer using a microSD to SD Card adapter.
-
Open File Explorer and locate the card under This PC.
-
Right-click the microSD card and select Format….
-
In the File System dropdown, choose exFAT.
-
Leave Allocation unit size set to Default.
-
Ensure Quick Format is checked.
-
Click Start.
-
When the confirmation dialog appears, acknowledge that all data will be erased.
-
After formatting completes, click OK..
Safely eject the card.
Prepare the AudioMoth Unit
-
Remove the device from its housing.
-
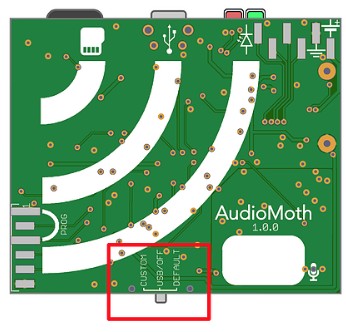
Move the switch to USB/Off.
-
Remove old batteries and microSD card.
-
Insert three new AA batteries (same brand and type).
-
Insert the freshly formatted microSD card.
-
Connect the AudioMoth to the computer via a USB cable that is capable of data transfer.
Update Firmware
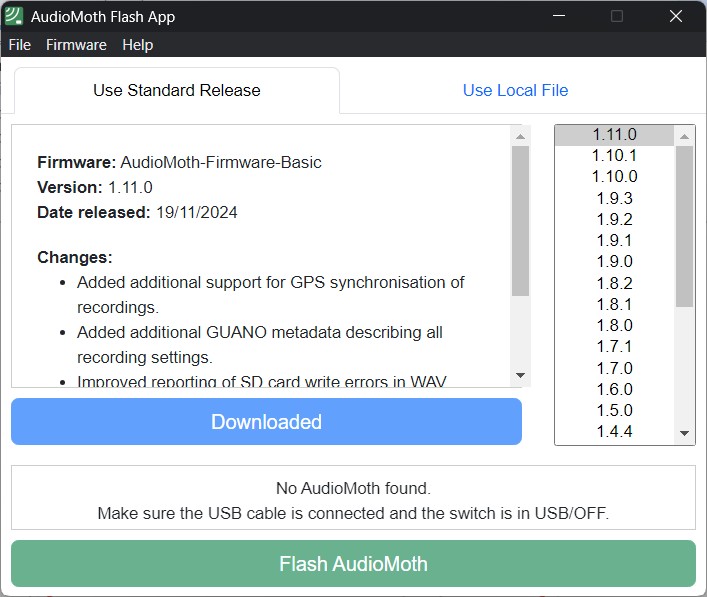
Use the most up-to-date firmware version unless you need an old version for some reason. The versions will be listed in the "Flash App".
-
Open the Flash App.
-
Download the latest firmware.
-
Click Flash AudioMoth.
-
Wait for confirmation that flashing is complete.